A Rice Crispy Treat Product Video
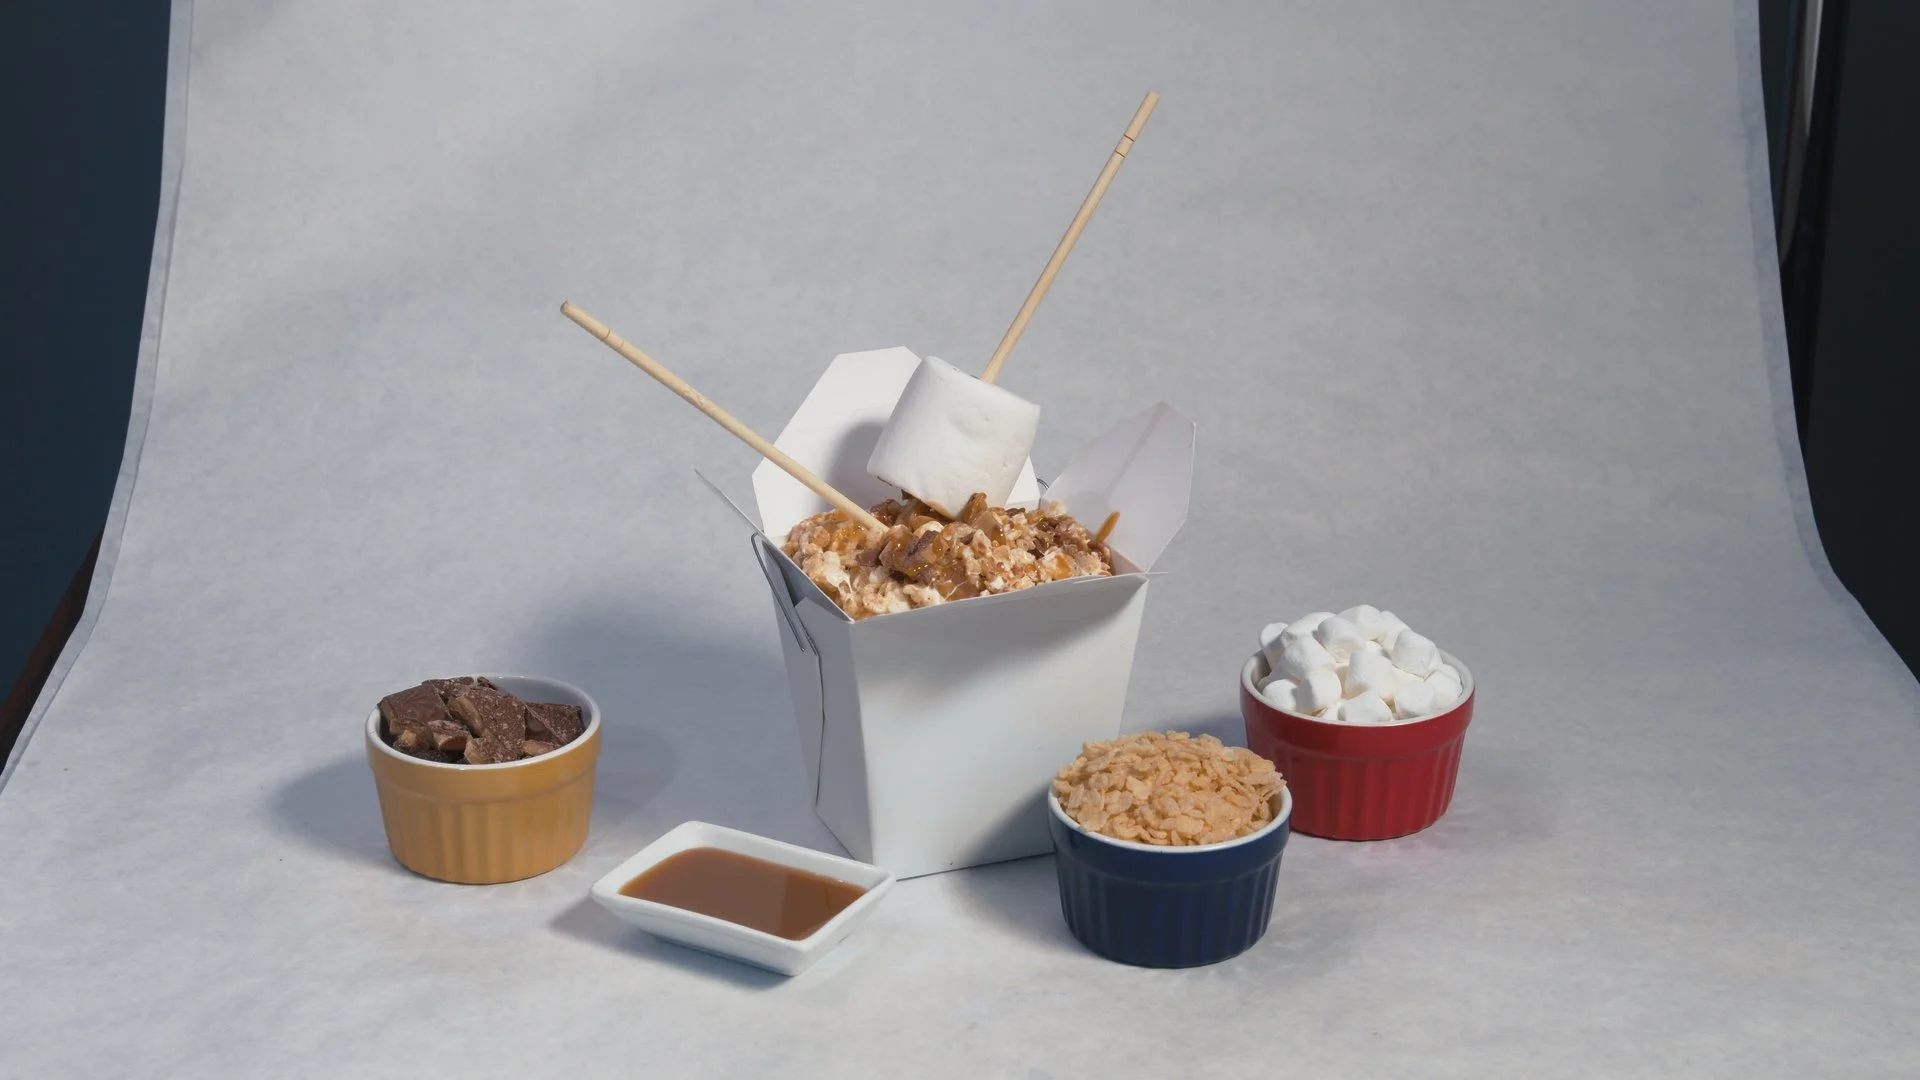
Social Media is the new place to spend advertising dollars, reach thousands of potential buyers, and so, its the new place to market for product videography. It seems that there are an ever growing amount of videographers so separating from the pack is one of the hardest parts of finding work. You don’t want to be too expensive that work passes you up, but more often than not, the clients that you want aren’t going to hire based on the cheapest available option. I think its good to provide value for the amount that you charge, but don’t sell yourself short! For this first blog post I thought I would dive into a past social media product video that I helped shoot for a small food stand called Wok This Way (yes its an Aerosmith reference) that sells made to order rice crispy treats with all the fixings out of Asian take out boxes. Sounds amazing doesn’t it.
After I found out that we would be working on this project, I started the storyboarding process. We chose the top performing flavor that they had and used those flavors to help drive the direction the video would go in. There are a lot of different ways to go about storyboarding, but the way I do it (and the easiest way imo) is using an iPad, an Apple Pencil, and the Procreate app with a storyboarding template imported into it. This way you don’t need to worry about printing enough pages with a template on them, you can put the drawings on separate layers so making changes is really easy, and it’s way easier to share via Google Drive, email, Dropbox, whatever you like to use to send files. Here’s one of the storyboarding options I had for the shoot.
The iPad also makes it really easy to show people on set what you are planning, and and write in their input onto the storyboard. I think this really helps them feel involved in the process, something that is a fine line you have to walk with product videos and photos. Now this storyboard doesn’t match completely to the video because we decided to make some changes during the shoot, but like I said before, they were easy to add in because of the system that I was using. This isn’t a sponsored for to Apple either (I mean come on this site isn’t nearly big enough for that), but the iPad really is one of my favorite tools for pre-production.
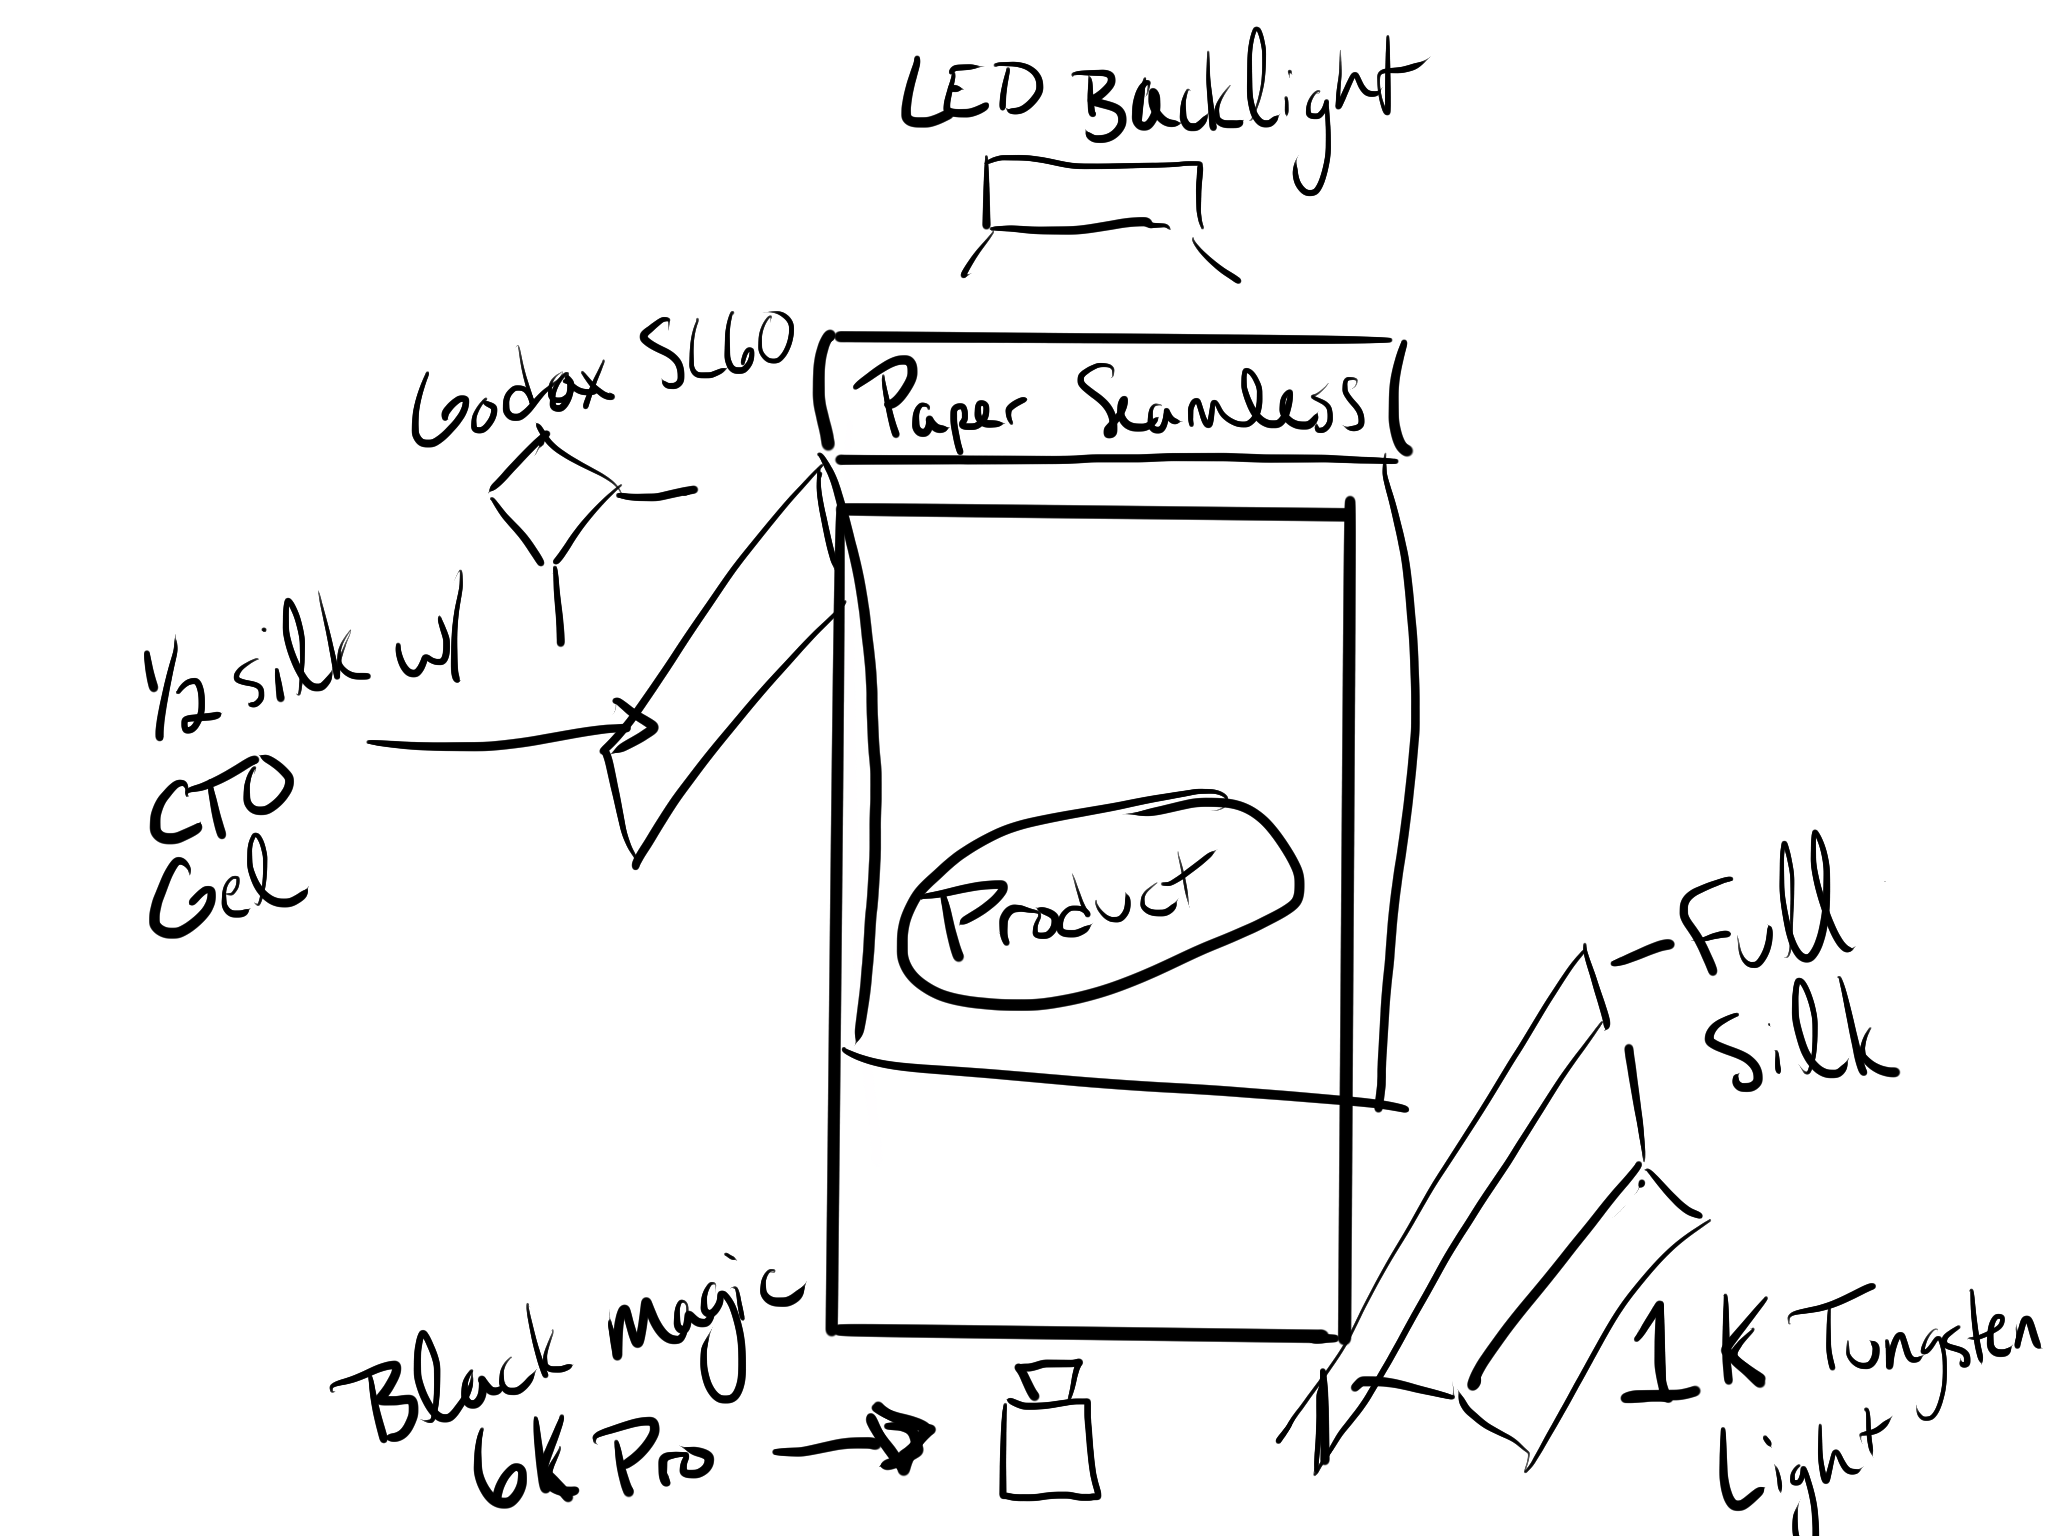
One of the big pluses of shooting product videos is that you don’t need to have a large space (funnily enough we were in a huge studio and used just a small fraction of the space) unless your making videos for huge products and it seems that those videos often become more lifestyle type than product videos. For our setup we used a dining room sized table with a few seamless paper rolls as our backdrop and a pretty basic 3 light lighting setup. Here’s a rough drawing of the setup we used.
As you can see in the drawing, we used a few silks, a 1/2 on the Godox and a full on the 1K light to add a nice soft light and then a CTO gel on the Godox to change it to 3200 Kelvin to match the other lights. I don’t know if I would do this again, or I would be more careful when doing this because we ended up having a sliver of daylight balanced light slip through during one of the shots and I had to crop in during the edit (not ideal when shooting 1080p 120fps). Once we had the lighting all set we only had to make minor adjustments to when we changed shots.
The video was shot on the Black Magic Pocket Cinema Camera 6k Pro (what a mouthful) and in my opinion its one of the best lower budget video cameras you can get. I’m a big fan of all the BMPCC variants. The one thing I wish it had is higher res slow mo, but the 2.8k is still great. We used one other tool, a $12 Lazy Susan that I got from Lowes, to add a little extra movement to the shots without having to take the camera off the tripod. We gaff taped a small piece of white foam core to the Lazy Susan to match the background and we were off to the races. Most of the shots took a few tries to get right since there was a lot of timing involved, but the most stressful one was early the caramel drip shot. For this one we got one chance otherwise we’d have to scrap all the marshmallows and rice crispies and of course I missed the marshmallow on the first pass, but it ended up working out and looking better than what I had envisioned.
There are a few things that I would change next time around aside form shooting without needing to rely on gels. The first would be to shoot against a black background. I think this would have given a nicer void-like effect, especially for the first shot of the marshmallows falling. It also would’ve been easier to use a luma mask to separate the product from the background in post. The other would be to bring a hazer. I don’t think these work for every shoot, but it would have been fun to experiment with and texture to the shots overall. All in all I think the shoot went pretty smoothly.
For editing I used DaVinci Resolve Studio 17. It’s my go to editing software and has been for awhile now. The one time payment for unlimited upgrades, unmatched color grading software, and all in once effect and audio software make it far better than any other softwares I’ve used in the past (and I’ve used just about all of them). Plus the free version is leagues better than any other free video editing software. Sometimes when I edit projects like this I use the song to drive the edit, but this time around I did the whole edit without any sound first and the added music and SFX after. I think this method is great if you want the video to be able to stand alone without audio and with most people viewing this from a phone, that’s really important because a lot of people keep the volume off or on really low. The rough pass was pretty self explanatory, I just trimmed the clips to a rough length and dropped them into the timeline in alignment with the storyboard.
The color grading process was fairly straightforward. I just converted the clips to the proper Rec. 709 conversion and did a little bit of tweaking with the color temperature and contrast. The final hero shot was the most involved. The original clip looked like this.
So, I had to mask around the products and I put a solid color with a gradient overlay and a paper texture underneath and adjusted the color of the solid color until it matched the background of our set. Since there was a zoom movement I also key framed the paper texture to zoom at roughly the same rate so the texture would match and then finally added a Gaussian blur to soften it a bit and it was completed. At the very end I added a Fujifilm film simulation LUT and turned down the opacity of it to about 30 percent and the visuals were finished, aside from some VFXs.
We have two versions of this video. One is a less VFX heavy, less stylized version. And the other is at the top of this page. It has a stylized retro feel to it and a more clear start and end with the T.V. that turns on and then shuts off at the end. Personally I am a fan of the stylize version. It has more of a defined personality and while that may drive a few people away, I think it ultimately makes the people who like it, enjoy it even more. The effects were really simple. There is a T.V. png with the screen cut out of if that I placed a stock video of a screen turning on (which is actually the screen turning off in reverse) an then I key framed a zoom in through the T.V. with an opacity fade out to get rid of the statice. The rest of the video has a VHS effect set to screen with the opacity at around 25% and another dust particle effect with a similar opacity on top of that. One of the transitions is different with a Kodak slide film transition from CinePack FXs. This was in their free film pack and I’ll link it here. It’s just a sample pack so if you want the whole thing you have to purchase it. At the end of the video I played the original T.V. shut down and then it was time for audio.
Audio is often said to make up 50% of the video experience and I’d defiantly agree with that sentiment. I use Epidemic Sound as my source of audio clips. The $20 a month is by far worth is for the high quality audio and the peace of mind knowing I can use it for any project that I am working on (also not sponsored by Epidemic Sound… I don’t have any sponsors lol) but there are a wide variety of sites like this so pick the one you like best. The client wanted a rock and roll feel to the music so I went with that and found SFX that match the video. This is always a challenge when working with slow motion clips because you can’t just search for what is actually in the video because the sounds in slow motion often sound nothing like they do at regular speed. It’s really just a searching game and thinking outside of the box. An example from this is that I used people walking through leaves for the sound of the marshmallows hitting the rice crispies. As you go you’ll build up a library of sounds that you like and will get a better idea of what sounds work for different slow motion objects. There’s a YouTube video from the Slow Mo Guys that goes over this. I’ll link it here. I found it really useful to see how he goes about finding sounds and the thought process behind it.
With the sound completed, the video was done! However, there is always one really important step that I find really helpful; having someone you trust to give you completely truthful feedback about what works and what doesn’t. I find it hard to see some of the problems with my videos because I have spent so much time with them. I’m too close to them to be able to say “That needs to be cut out and that needs to move quicker.” So I had people look at the video, implemented some of the feedback (you don’t have to do everything they say, ultimately it is your choice) and then felt comfortable enough with the finished project to call it done. To end it we just delivered it to the client and started to gear up for the next project that comes our way. If you have any questions feel free to reach out to me and if there are any other videos on here or on my instagram etc… that you’d like me to break down in a blog post or a video, just let me know!
Happy Shooting,
John


